Monday, September 30, 2013

She Can Sleep Anywhere!

This is the second and slightly more successful attempt at using up those Yes, Please scraps. Last layout I only used pieces from two sheets and this layout uses up paper from six sheets and the background is an additional sheet. Woot!

I knew I had a bunch of these greenish pieces to use so I looked for pictures that needed something calming. These shots of Audrey, sacked out on a pile of gravel were just the thing!


I used three pieces of Bossy Joscie flair accented with some Basic Grey candy buttons to help draw your eye around the layout as all the elements are clustered in the middle of the page.


The "I {heart} THIS" actually had a little red heart there. But, it was the only piece of red on the page and it was too small to be a focal point of the layout and too distracting otherwise. So, I cut an asterisk from the Thicker set I used to create the little heart. It covered up that red just perfectly! 


I ran the title across the top of the photos because I liked how they sit up there at two crazy angles just like my Audrey sleeps wherever she ends up.


The letters I used to spell sleep are actually solid teal but I added the dots because they kind of faded into the gravel in the background and there are two other pieces of teal paper that have little white dots on them so it works really well.


I really like how this layout turned out. It's calming but still a little all over the place, if you know what I mean.

The really funny thing is (as if her sleeping on a bed of gravel isn't funny enough) is that this happened during a family function with tons of kids running around playing. She got tired, made a pillow of gravel and went to sleep in the sun. Andrew actually moved the toy kitchen to shade her.

She can truly sleep anywhere!

Friday, September 27, 2013

True Story

Well, since I had dug out and used that impulse buy of Amy Tangerine's Yes, Please line, I decided to work a bit with the leftover scraps I had. I put this pic of Lilly in our Project Life album but wanted a bit more room to tell the story.


I also used some of my new goodies from Pinkfresh Studio. The little house, the chevrons, and the heart are all from there. The chevron strips are the tearaway pieces from the Yes, Please paper pad.


I love the little wooden dogs and used this one (probably an Airedale?) because it looks the most like Lilly. She's actually half Standard Poodle, half Great Dane.


I also really wanted to use some Bossy Joscie flair and created this little sun/cloud cluster with it. 


I added Lilly's name below the dog image and put one of the hearts from Dear Lizzy's Neapolitan line there as well. The clouds are from the same die cut pack.


The journaling tells the story of how confused/upset Lilly was after I took Audrey to preschool the first day. With Mickey gone all day and now Audrey leaving, poor Lilly was missing her kids after a long summer having them with her all the time. 

I love that dog!

Wednesday, September 25, 2013

How I Project Life Now


     Here's a quick little break down of how I make my Project Life pages. Well, how I've been making them lately. ;)

First up, I pull up all my photos from that week in Lightroom and then quickly run through them all starring the ones I think are PL candidates.
 

Then, I select just those that I just starred by choosing "rated" under the filter section. After that I weed out a few based on how much space I have and which stories I really want to tell. I've come to realize that I don't have to put every...single...moment...that I capture in my PL album. I don't know why it took me so long to realize that. I mean, I've never felt obligated to scrap every photo before, not sure why I felt this way. 
Anyway, once I have them nice and narrowed down, it looks something like this.


Much better. I export all of these to Photoshop and then print them. The Instagram pics get printed at 3" square, two to a 6"x4" sheet, the horizontal photos from my big camera get printed at 6"x4" and the vertical big camera pics and other iPhone pics get printed at 3"x4" on a 6"x4" sheet.

I used to print them out onto regular printer paper as drafts and then get them all printed at Costco and swap them out. But, I fell behind very easily this way and I've really not been happy with the quality of the prints at Costco so now I print at home. I like it much better this way and I've started printing my regular scrapping photos at home, too.

Once I've got my photos printed out, I lay them out on two 12x12 sheets of white cardstock that I've drawn the pocket lines on. I first saw this idea on a process video by Mercy Tiara here. She does it so she doesn't have to drag out her album to work on her pages and doesn't have to keep pulling items in and out of pockets. It works sooooo well for me. 

This week, I had so much from Audrey's first day of school that I realized I was going to need an insert. So, I cut a sheet of 12x12 white cardstock in half and made a template for my insert as well.  Here are all of my photos and memorabilia laid out on my templates. I cut down two of my 3"x4" photos to 1 1/2"x3". Mainly because I couldn't decide between the two and wanted to keep both of them. 


Next, I chose the paper line I wanted to use. I picked Yes, Please by Amy Tan. Mainly because I was lured into buying a paper pad of it when I found it on sale for $6 at Marshall's and after hearing Noell Hymann rave about it on PRT. So, I had it and I knew I darn well better use it!


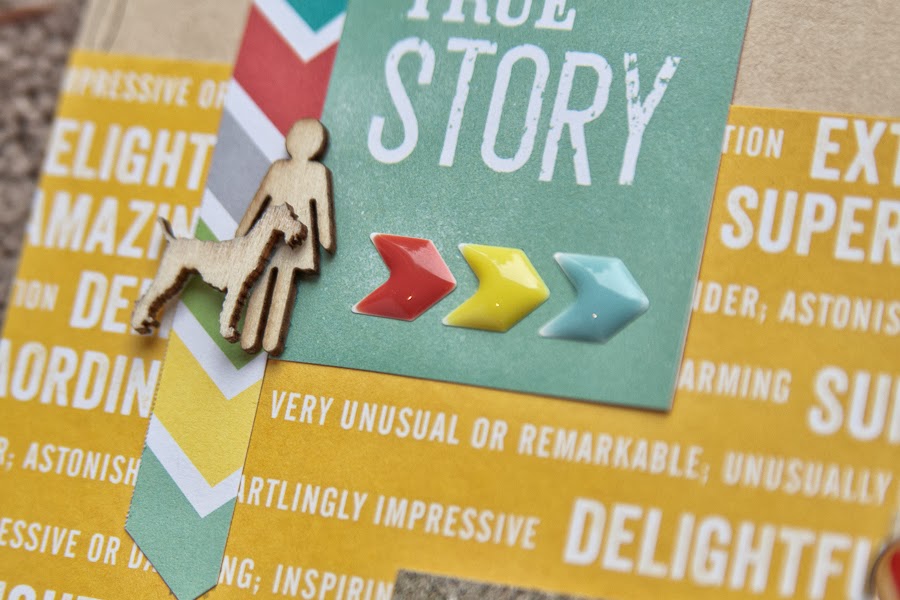
After getting my papers situated, I used one of the cut apart sheets and added some flat embellishment and glued everything down.


Then I finally rounded all the corners. I used to do that to my photos ahead of time and would wind up moving something so that I'd need to redo it. Then, I did it at the very, very end only to realize that it messed up some embellishing. So, now I do it after gluing, before embellishing. (Probably more info than you needed here.)


The last step is to do my journaling, embellish everything and create my title card. I like to create it last so that if I need another pop of a certain color I can add it there without worrying if it goes with a photo or not.

So, here's the finished pages, all set up in their page protectors. Mickey lost another tooth, I had my first PTO meeting, and he did his first homework as a first grader. I also included a few things that Aud and I did while he was away.


Here's my big man waiting for the bus by himself for the first time, while I watched from the window.


The insert is all about Audrey starting her second year of preschool. She had her Open House on Wednesday and her first day was actually a Friday! She was glad to see the guinea pig, Callie, was still there because she switched to the am class and it's a whole new group of kids. 


The last page is some everyday stuff, a collage of pics from the 50th birthday we attended and just really photo heavy.


 I used part of a Nordstrom's bag as the background for this pocket. Aud and I went shopping with my mom and ran into my sister-in-law Theresa, my two nieces and their aunt from their dad's side. It was pretty funny because my mom and I always seem to run into Theresa everywhere!


So, that's my current process for Project Life. It's interesting to see how my approach has changed over time. If you are a Project Lifer, has your process changed or stayed the same?

Monday, September 23, 2013

Project Life 9/2-9/8

Just sharing another week of Project Life. 

Mickey's first week of school. He loved every minute. I missed him like crazy!


Love that little leaf that Audrey painted on with metallic watercolors. 


I some of her other painting as the background for these selfies of us.


Making my own little journaling cards. I'm enjoying that. :)


I took some pics of my process for my next week and I'll share them on Wednesday. 

Wednesday, September 11, 2013

Catching Up With Project Life

I've been scrapping my little tuckus off, getting caught up on my Project Life album. Oh, how I love this project! I didn't work on it at all while I was working and yet, it's sooooo easy to go back and do. Right now, I'm starting with the current week and working backwards. So, that's the way I'll share them with you. 

*This is actually two weeks ago, I just finished last weeks last night and there's no light here at 10:00 pm!


This was our last week of summer vacation before Mickey started school. We FINALLY got a new dryer and I was FINALLY able to get the kids to the beach. Heavenly!


This week also had us sorting through clothes, meeting his teacher and helping at back to school night. Oh, and some lost another tooth!!!


I used Simple Stories products for this week. I just felt inspired by them and wanted to use something other than the Project Life branded products I had on hand. This little card has two pieces of the same photo on it. I cut it up so that I could journal in between the images and so that cute little tab would show!


My first catch up week! This was the first week I did that wasn't immediately after that week ended. It really isn't that hard to do. 


I worked on my scrap room, had a sick kiddo and got my very first layout back from being pubbed in Creating Keepsakes!!! Woot!!! 


This was also Andrew's birthday week and since he was at work so much and even out of town the night before his birthday, I didn't get a single picture of him. The one of him and the one of his present from his mom were taken while I was working on this page. (Years from now, no one's going to care or even know!)


I didn't have anything to go in this space as the week was so picture light, so I made this cute little filler card. I used my beloved Project Life Core Kit in Clementine for this week.


Another catch up week. Since I was doing them pretty much one a day, I decided to use some of my scrapbooking collections. I made myself use the first set of papers/stickers that worked and didn't dig through looking for "the best" set that worked. This week, that was Lilybee's Sweet Shoppe.


This was our week right after we got home from Hawaii and boy did we keep busy! My friend Joscie and her family stayed with us Monday night and we showed them around Canby. (I snagged the Lego heads pic and the selfie of us from her Instagram feed. Thanks, Joscie!)


The last half of the week involved our county fair which is held in our hometown and I had season passes to. We also had a party at our house for Andrew's work. It was such a crazy week!


I used some super cute custom Bossy Joscie flair on my page. Hand delivered from Miss Joscie herself. (Yeah, I feel cool. Hee!)


Well, that's as far into the past as I've gotten. I should get another week or two done this week so I can share that as well.

Thanks for stopping by!

Friday, September 6, 2013

Family Heirlooms Mini Album

I made a mini album documenting all the family heirlooms that we live with in our home. And, do we have a lot!  

I made an intro page and then misted the first wet media page with some Lindy's spray and a chicken wire mask. These chairs that now live in my kids' bedrooms used to be used in the drying and sorting barn on my grandfather's teasel farm. 


I played with another mist and a vintage doily mask from Kaisercraft. I used the acrylic page to document some really cool books that I read when I was in the 5th grade. It's an Encyclopedia of sorts for kids called The Book of Knowledge. I read all of them and loved them! 


 On the back is the lawyers case that I was given by my grandparents because I was one of the few family members who had read those books.  LOL! Throughout the book I used these tags I cut out. I threaded them all with Denim Lil' Twiney. Next are some half sized pages.  The photo of the heirloom is on the front and the information about it is on the back. There's a bench from my mom's grade school, a mirror from my grandfather's dresser, a bottle crate from my grandparents grocery store and some milk glass from my grandmother. 


I still love making these cute little banners by cutting a Lil' Petal into fourths. 


The next acrylic page has the story of my great-grandmother's laundry basket. I used the lacy looking paper for this because she was a great seamstress and it felt appropriate. :) 


 I have a teasel basket, again from my grandfather's family farm, by my front door that's just perfect for holding shoes, helmets and other outdoor gear. The next wet media page has more mist with the doily mask and the story of my great-grandmother's irons. It's crazy to think that I use for decoration what she used everyday for it's intended purpose! 


 These last two pages have some room left for a few more items I need to document.  I have a few pieces of furniture made by my great-grandfather in my room that's just waiting to be tidied up so I can get a clean shot.  LOL! 


The Traditions line from Carta Bella was just perfect for this album. The colors and patterns work beautifully with the theme of family heirlooms. I'm really glad I made this album, it's important to me that my kids know about their past.

Supplies Used:
Punky Sprouts:  Punk-a-licious, Funky Punky Fiber Pack-Denim, Funky Punky Fiber Pack-Canvas, Lil' Petals-Denim, Lil' Petals-Canvas, Lil Parchment Blossoms
Carta Bella:  Traditions Collection Kit
Lindy's Stamp Gang:  Rudolph' Nose Red, California Poppy Gold, Gator Gumbo Olive, Breakfast Club Blue
Other:  Ink-Ranger